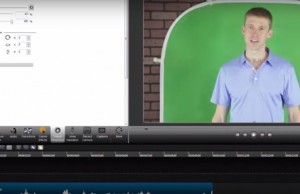
When I started in video production, learning how to ‘Chroma Key’ was a high-end skill (that, and learning how to use the ‘Chyron’). It was very cool to see the weather-person pointing to a blank screen as the control room overlay the forecast images…as well as see the imperfections when the announcer wore a color a bit too close to the bluescreen behind them and the keying came through on their clothing!
One lesson learned from those earlier days; blue was not a good color to key against as it’s a pretty common in everyone’s wardrobe …thus the move to the more uncommon, luminescent green we see today, and the now more recent event of ‘greenscreening’ becoming a verb.
Keying (or greenscreening, or color overlay, etc) is a lot easier these days, as so many things, with advances in computer power and tools. You can buy a cheap greenscreen setup on Amazon, or an even cheaper green sheet (or really, any solid unusual color), and setup your own ‘studio’ to record a presenter behind which you will later add related images. Stephen Colbert helped popularized this in 2007 with his green screen challenge, resulting in a great range of creative submissions.
So why is this an effective eLearning technique? Enhancing a video presentation with supporting images and animation not only increases the overall likelihood of the viewer’s engagement but is simply almost mandatory in these days of high-end, rapid fire video presentation.
Let’s take a simple example – a typical recorded lecture with a two camera setup; one midshot following the presenter and the other long-shot taking in the overall stage. At best, you can cut between the two to allow some variation in the overall presentation, and perhaps occasionally cut-away to static PPT slides the speaker is referring to.
But why not take an extra step? Why cut away to PPT slides, why not fade them in next to the presenter? This is a common presentation on TV and should certainly be a strategy used in educational video. Even better, you can key in other video footage behind the lecturer and, with proper rehearsal, have the lecturer point out key areas of the footage, just like the weatherperson on TV!
 These techniques used to be relegated to professional tools like Premiere, Final Cut Pro, and After Effects (among many others), and those remain solid tools. But you can also achieve pretty solid keying results with Techsmith’s Camtasia (“Remove a Color” feature). . There’s a lot of info out there regarding this process, so I’ll leave the details to the following links and videos:
How to create a DIY green screen video effect (aka chroma key) (Techsmith)
How to do the Green Screen Effect in Camtasia (G6 Studios)
A good general discussion on quality and suggestions (Techsmith)
Two suggestions:
- Lighting is critical to a quality key. The color overlay process requires you to define the color range to ‘knock-out’. The more consistent the actual color, the cleaner the key. If the green bedsheet behind you is not well-lit, to the camera it will vary in shades of green…which then requires you to identify a larger range of color to overlay, which will result in a blurry scene.
- Practice and use a teleprompter. While a professional teleprompter (that sites on the camera, with the camera shooting through it) is great and allows perfect eye-contact, they’re not cheap. You can make an inexpensive teleprompter with an old laptop and free software like CuePrompter.
There are lots of videos on YouTube demonstrating a range of greenscreen techniques. Here are a select few:
Using Greenscreen to Make Educational Videos
‘Green screen – before and after’ – neat video on a pretty complex studio setup. It’s a good demonstration of what can be done and the effort it can take but don’t be daunted, you don’t have to get this complex, per the next examples…
How to Build a $20 Green Screen
How To Effectively Light Your Green Screen
One thought on “How and Why: GreenScreen eLearning Video”
Comments are closed.